Despite its European origins, meatloaf is eaten all over the world; a few years ago it was voted the 7th favourite dish in the US. Varieties involve using other ground meat rather than beef, not just poultry but seafood too! You could try wrapping it in ham as they do in Austria, or stuffing it with hard boiled eggs which is popular in Cuba, Germany and Greece. For the leftovers (if there is any!) , fry it and serve for breakfast as they would in the Philippines!
This is a quick and easy recipe, great for if you want a traditional home cooked meal and you don’t want to be stood in the kitchen for ages making it! This meatloaf can be served with vegetables and gravy, however we paired it with a homemade spicy tomato salsa for a bit of a fresh kick.
Written by Danielle
Serves:4-6
Prep time: 15 minutes
Cooking time: 55minutes
Ingredients
For the meatloaf
2 slices of brown or white bread (or you can use 80 grams breadcrumbs)
1 kg beef mince (we used 5% fat, lean mince)
1 large red onion, chopped
3 tablespoons tomato ketchup
1 egg
2 tablespoons of Worcestershire Sauce (we used Sheffield’s own Henderson’s Relish)
70g Parmesan Cheese, grated
1 tablespoon milk
Salt and pepper to season
For the salsa
300g tomatoes, chopped
Half a red onion, chopped
1 chilli, chopped (more if you’re feeling brave!)
2 tablespoons of fresh coriander, chopped
Juice of half a lime
Salt and pepper to season
Equipment
Large Bowl
Knife
Chopping board
Wooden spoon or similar
Food processor
23cm x 13cm loaf tin
Cooking Method
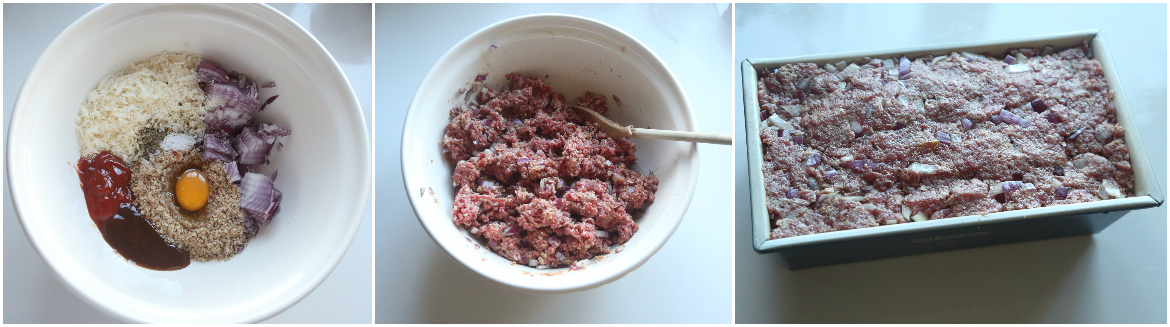
Preheat the oven to 180°C/350°F/Gas 4.
Place the bread in a food processor and pulse to make breadcrumbs.
Mix all the other meatloaf ingredients together with the breadcrumbs.
Place in an ovenproof dish or loaf tin. Bake in the oven for 50-60 minutes, or until a skewer inserted into the centre comes out clean.
Make the salsa whilst the meatloaf is cooking by mixing all of the ingredients together.
My 5-year-old must ask for this meal 2-3 times a week. I do try and vary mealtimes a little more than that, but his demands are met at least fortnightly, if not weekly!
The recipe is so quick and easy to make, it is packed with the good stuff and is perfect for making the night before when I know we’re going to be back late from an after school club (usually football in our house!) – 10 minutes heating up while the pasta cooks and voila!
Written by Rachel
Kids in the Kitchen
Chorizo – A challenge for little fingers, get your kids to try and peel the skin off the chorizo. This isn’t necessary though will make the chorizo more tender having removed it but may be fun for them to try and also may keep them entertained for a while.
Pasta – Get out the scale and measure how much pasta you need. If each person typically eats 100 grams pasta and there are 4 of you altogether, how many grams is that in total! If they are into this you can have a more fun with the scale by weighing 10 or 20 pieces of pasta and work out how many pieces will feed one person and so on.
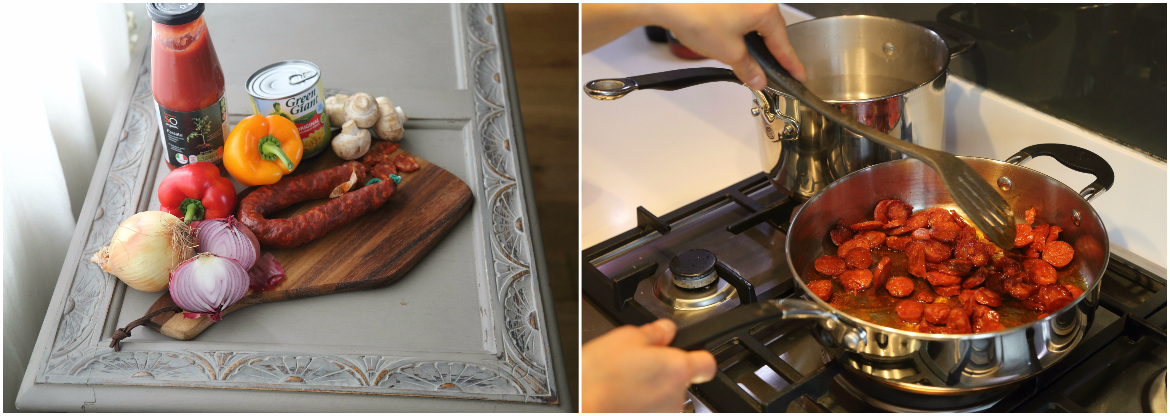
Gently fry the sliced chorizo in the sauté pan over a medium heat. There is plenty of oil in the sausage so no need to add any extra.
Whilst this cooks, chop the onions, peppers and mushrooms.
When the chorizo has started to brown (5-10 minutes), drain about half of the oil from the pan and throw in the chopped vegetables. Fry for about 5 minutes.
If you are going to eat immediately turn on the pasta at this point.
Once the vegetables have softened, add in the jar of passata and the drained sweetcorn. Cook for a further 10 minutes to allow the flavours to fuse.
Drain the pasta and serve topped with Chorizo pasta sauce and a dusting of grated Parmesan.
For some of you Chia Seed Pudding may be ‘so last year’ or even 5 years ago for that matter, but I’ve only this year discovered Chia seeds/Chia seed pudding and I am definitely an enthusiast. Despite being so tiny, these little seeds are packed with good stuff. They’re full of antioxidants, omega 3’s, calcium, protein and fibre. Chia Seed pudding is a great way to start your day, as a healthy snack or even a dessert. Below are a couple of my favourite ways to top Chia Seed Pudding, but feel free to experiment with different fruits, nuts and toppings to your taste – that’s the fun part!
Place the chia seeds in a bowl or container. Add the plant milk along with the vanilla. Mix with a fork or whisk until incorporated. Leave to rest for 5 minutes then stir again thoroughly. Now leave for 3o minutes to an hour, or overnight in the fridge.
Distribute chia pudding into bowls/glasses or mason jars, whatever you’d like to eat them from. Then using the garnish ideas below begin mixing/ topping/garnishing your pudding. Enjoy!
Types and Garnish Options
Mango Ginger Breeze
Fresh ginger, finely chopped (best to mix this in at the chia seed and plant milk stage)
1 tablespoon cacao or coco powder thoroughly mixed into the ready chia pudding
1 tablespoon maple syrup
3-4 strawberries, sliced
1 tablespoon (per person) nut butter
Top with cacao nibs or grated dark chocolate
The Colada
1/4 of a pineapple, cut into bite sized pieces
Dollop of coconut cream (this is made from 1 can of coconut milk, pour out the liquid and only use the thick coconut cream. Add 2 tablespoons of caster sugar and 1 teaspoon of vanilla. Mix well and refrigerate for at least 15 minutes before using.)
My friends and I can’t seem to get enough of guacamole at the moment. Someone brings it to every gathering or get together we have. We have it with tortilla chips, freshly cut vegetables, flat bread, anything really. This recipe can be served as a snack for a group of people or split between a few people as more of a main. BUT Avocados can be expensive, so give your local markets a try as they sometimes have amazing deals. My friends swear by the Moor Market in Sheffield if you’re local. Also a great way to save is to buy them on offer. The avocados I’ve used in this recipe are from the co-op but were reduced and perfectly ripe, bar one which was slightly too far gone.
Another safe bet with avocados, as timing can be tricky, is frozen avocados. Yes, you can freeze avocados! This is fab if you buy a bunch at a market or on offer, just make sure to remove the stone and skin before freezing. Even more exciting is that Tesco stock bags of frozen avocado halves at a pretty reasonable price too. (Quick Tip – these are in with frozen vegetable, not fruit section!) Perfect for keeping in the freezer for your last minute avocado needs. I must admit I’ve even defrosted them slightly in the microwave or in a freezer bag in some warm water, when in a hurry to use them.
This recipe is packed with so much vegetable goodness it’s unbelievable. The seasonal foods for June we’ve used are tomatoes, garlic, red onions and coriander, as well as carrots and courgettes served alongside to dip in the guacamole.
Written by Corin
Serves: A crowd as a side dish/dip or 2-3 as a light meal Prep time: 15 minutes
Ingredients
4 medium/large ripe avocados, stones and skin removed then flesh chopped
100g cherry tomatoes, quartered
1 stick celery, finely chopped
Half of any colour pepper, chopped
1/2 -1 small red onion or 1 shallot, finely chopped
1 clove garlic, crushed or finely chopped
2 tablespoons fresh coriander, chopped
juice from 2 limes
Half of a small chilli pepper, or a pinch of chilli flakes
1/2 teaspoon ground turmeric
season to taste with sea salt and freshly ground black pepper
Place the chopped avocado in the bowl or saucepan. Mix in the onion, pepper, celery, garlic, coriander, lime juice, chilli or flakes and ground turmeric. Mix well and season with salt and pepper to taste.
Then lastly add the tomatoes and mix gently to incorporate.
Comments Off on Roast Lamb with Pickled Shallot Mint Sauce
The lamb roast – a great show stopping centerpiece for any celebratory meal or even your usual Sunday lunch. You simply can’t beat it, especially with a freshly made mint sauce.
This Pickled Shallot Mint Sauce is a twist on your traditional mint sauce inspired by a love of pickled and fermented foods. I can guarantee you’ll enjoy this light and tasty, no fuss sauce alongside your roast lamb. Pickled and fermented foods have been gaining in popularity over the last few years and have become quite ‘trendy’ given the interest in their bold flavours, health benefits and a desire to create hand crafted foods with artisan technique.
For the lamb, we’ve cooked it based on a Hugh Fearnley-Whittingstall recipe which uses the typical garlic and rosemary combination with the addition of slivers of anchovies as a means to season the joint. This recipe is a fail safe one we have used on many occasions.
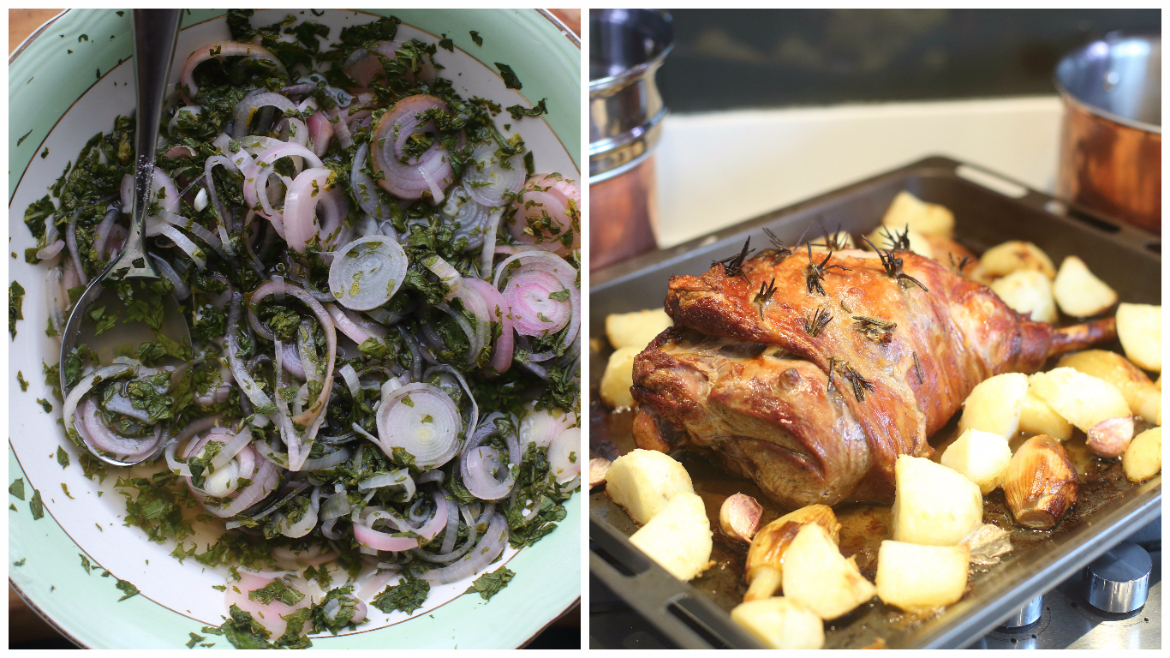
Use a small knife to make about 12 5cm deep cuts into the flesh side of the joint. Insert a piece of garlic with half an anchovy and a small piece of a sprig of rosemary into each cut.
Drizzle the remaining oil from the anchovies over the leg of lamb. Sprinkle over plenty of black pepper and place lamb in the roasting tray pouring the wine around it.
Put in the oven and let sizzle for 30 minutes then turn down the oven temperature to 180°C and roast the lamb for a further 50 minutes, depending on how rare you would like your meat. These timings will yield a medium-rare roast so for a more well done roast cook slightly longer.
Periodically baste the meat during this time with the wine and juice in the roasting tray. Once done, take the roast out of the oven and remove from tray onto a double layer of aluminium foil and wrap it securely. Leave the roast lamb to rest for 15 minutes with a few tea towels around it as well for insulation.
In the meantime, taste the juices to see if any seasoning is needed and if the juices are too thin, decant into a saucepan and reduce slightly over a medium heat on the hob.
Cooking Method – Pickled Shallot Mint Sauce
Bring a medium saucepan of water to the boil.
Par-blanch the shallots by placing them in the sieve and putting the sieve in the boiling water for 1 minute, moving the shallots around with a spoon so they are evenly blanched, then remove. You can also hold the sieve over the sink and pour the boiling water over the shallots.
In a bowl place the chopped mint, shallots, white wine vinegar, boiling water, salt and sugar, then mix well.
Let stand for 10 minutes and serve with meat when it is ready. Use the sauce within 5 days of making.
The clocks have gone back, the leaves on the trees are turning … winter is coming! But it’s OK because that means slow-cook season is back.
In my opinion a delicious beef stew will bring warmth and comfort to even the coldest day. Shin of beef is perfect for stewing, it is a reasonably cheap cut of meat with a lovely gelatinous grain running through it. When you cook it slowly in a delicious broth the ingredients transform into a rich, melt-in-the-mouth ‘wonder-dish’.
I’ve included a few of Sheffield’s finest ingredients in our recipe. Henderson’s Relish has been made in Sheffield since 1885. It is a secret blend of tamarinds, cayenne peppers, vinegar, garlic and cloves. A splash or two of Hendo’s adds layers of sweetness and spice to the stew. I chose Bradfield Brewery’s Farmers Brown Cow for the ‘ale’ element of the stew. Bradfield is a picturesque village nestled away in the Peak District. The brewery uses natural spring water from a borehole on its own farm, together with the finest malts and traditional hops to brew their award-winning beers.
You might notice something a bit different about the pan that we’ve used for this recipe. This is the first outing of our premium copper base stockpot. We developed the new range of cookware to complement the existing copper tri-ply. The bodies are made from one thick sheet of 18/8 grade stainless steel, making them lighter than the copper-tri-ply. The base is a combination of stainless steel, aluminium and copper utilising the same energy-efficient and heat-dispersing technology that you find on the professional tri-ply range. The stainless steel doesn’t tarnish in the same way the copper does so it is really easy to keep the pan bodies looking pristine. The pans have deep bodies to ensure that they have serviceable, family-friendly capacities. We also opted for glass lids which means that you can keep an eye on your food bubbling away on the hob-top and we included a soft grip section on the handles for a bit of additional comfort when the pans are being used. We are so excited about the pans making their way to market and we hope that you love them too.
Written by Faye
Serves: 6 as a main dish
Prep time: 25 minutes
Cooking time:3 hours
Ingredients
For the Stew
1kg shin of beef, cut into ‘egg-size’ chunks
A handful of flour, seasoned with salt and pepper
Beef dripping (or another fat such as butter or olive oil)
Heat the fat in the stockpot until it is very hot. Fry the meat in batches, ensuring that the meat is evenly brown. Remove the meat with a slotted spoon, leaving some fat behind in the pan.
Fry the sliced onions in the fat left in the pan. Cook the onions gently for 5 minutes until they are a medium brown colour.
Return the fried meat cubes to the pan and combine with the onions. Deglaze the pan by adding a splash of the stock and scraping up the flour and any of the seasoning which might be starting to stick to the pan.
Add the beef stock, the beer and the bay leaves. Cover and bring to the boil. Reduce the heat and simmer for 2 to 2 and a half hours.
Prepare the dumplings by mixing the suet, flour and mustard powder together in a bowl. Add a few tablespoons of water, just a little bit at a time to ensure that the dumplings don’t become too sticky. Don’t overwork the mixture, the dumplings should be just about moist enough to ensure that the ingredients hold together when rolled into balls. Separate out into 8 balls, cover & refrigerate.
After about one hour on the hob top add the thyme and the vegetables.
20 – 25 minutes before you are ready to serve sit the dumplings on the top of the stew and cover with the lid. The dumplings will increase in size so remember to leave plenty of space between them.
Once the dumplings are cooked through serve the stew in pre-heated bowls. Season with Henderson’s relish to taste and enjoy!
Comments Off on Baked Salmon with Spinach and Basil Pesto Pasta
Have you ever tried making your own pesto? It’s so simple, quick to make, fresh and you can substitute so many of the ingredients to suit what you have in your cupboards. Below are the various versions I have made finally settling on the Spinach and Basil Pesto.
Pesto Versions:
Curly kale, hempseed, garlic, lemon and flax oil pesto (with and without adding a cup of basil) – This yielded nice results. Use the same amount of hempseeds as you would Pine nuts and 3-4 cups Kale. The hempseeds can be hard to find in UK supermarkets, but are very good for you and packed with protein. So if you’re interested in trying this, finding them online or at a health store is probably your best bet. Flax oil brings a lovely nutty flavour to pestos, but make sure not to heat any left over pesto made with flax oil because it should not be heated, however it will be ok if added to warm pasta.
Cavolo nero kale, hempseed, garlic, lemon and flax oil pesto (with and without adding a cup of basil) – I found this type of kale quite bitter, which was refreshing, but not my favourite of all the different types I tried. Make sure to remove the centre rib of this kale before adding it to the food processor.
Curly kale, Pine nuts, garlic, lemon and olive oil pesto – I found the pine nuts yielded a smoother pesto than the ones made with hemp-seeds as they seemed to break down more in the food processor.
Spinach, walnut, garlic, lemon and olive oil pesto – Tasty, not much different to the full recipe below.
Baked spaghetti squash with homemade pesto – This was absolutely delicious and a fabulous alternative to traditional spaghetti if you are going gluten free. A friend of mine brought a spaghetti squash over, we baked this in the oven (how to bake spaghetti squash) and mixed in some pesto. Since then I’ve looked everywhere in order to recreate it but can’t find them anymore, hence why this version didn’t make the final cut. Do keep your eye out for this squash next autumn though because they are a very tasty, low-carb alternative to spaghetti.
In the below recipe, I’ve used whole wheat organic pasta, wild salmon and limited the amount of Parmesan to a light sprinkling before serving in order to make this healthier.
I’ve also added spinach to the pesto which ups the usual vegetable content of pesto.
Peel the garlic and blitz it in the food processor until finely chopped.
Add the spinach, basil, lemon juice, pine nuts, salt, pepper, parmesan cheese and chilli flakes (if using). Blitz again a few times, then gradually start to add the olive oil. After it is slightly mixed, open the food processor and use the spatula to scrape down the edges of the bowl.
Continue to blitz the mixture until it is smooth. If you would like a more creamy pesto add 1-2 tablespoons of water and blitz until the desired smoothness is achieved.
Cooking Method – Salmon and Pasta
Preheat oven to 200°C and bring a medium to large saucepan with water on to boil.
Put the salmon fillets on a foil lined baking dish or on a tray, skin side down. Pat the salmon dry with a paper towel. Season lightly with salt and pepper then spread a heaped tablespoon of pesto onto the top of each fillet. Reserve the remaining pesto on one side for the pasta.
Transfer the salmon to the oven and bake for approximately 10-15 minutes. Salmon can cook quite quickly depending on its thickness, so keep an eye on it as it is done when it is easily flaked. At the same time, start your pasta in the boiling water and cook according to instructions on packaging.
Strain the pasta when it has reached desirable tenderness and mix in the remaining pesto. Serve the pasta in pasta bowls or plates.
Remove the salmon from the oven when ready and place on top of the pasta to serve. Sprinkle lightly with Parmesan cheese and enjoy!
This dish is a regular in our house since my father-in-law made it for my husband and me a few years ago. It’s based on a recipe from the Silver Spoon Pasta cookbook, if you haven’t heard of the Silver Spoon cookbook this review of their pasta book is worth a read. For this recipe I’ve increased the amount of tomatoes and pasta, because the tomatoes are my favourite part and we tend to eat larger portions of pasta than the original recipe calls for. We also added the Parmesan and Pecorino.
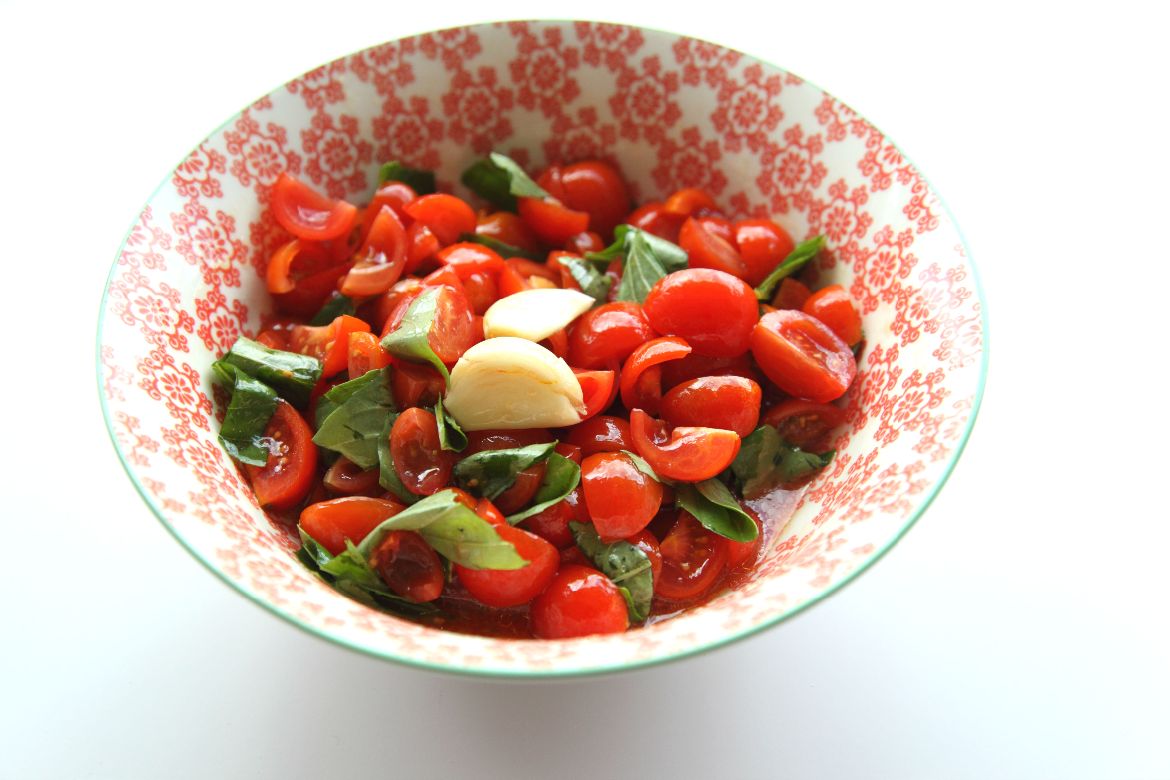
Here is the tomato mixture ready to be covered and left to sit for 20 minutes. This helps intensify the flavour in the tomatoes as well as infusing them with garlic.
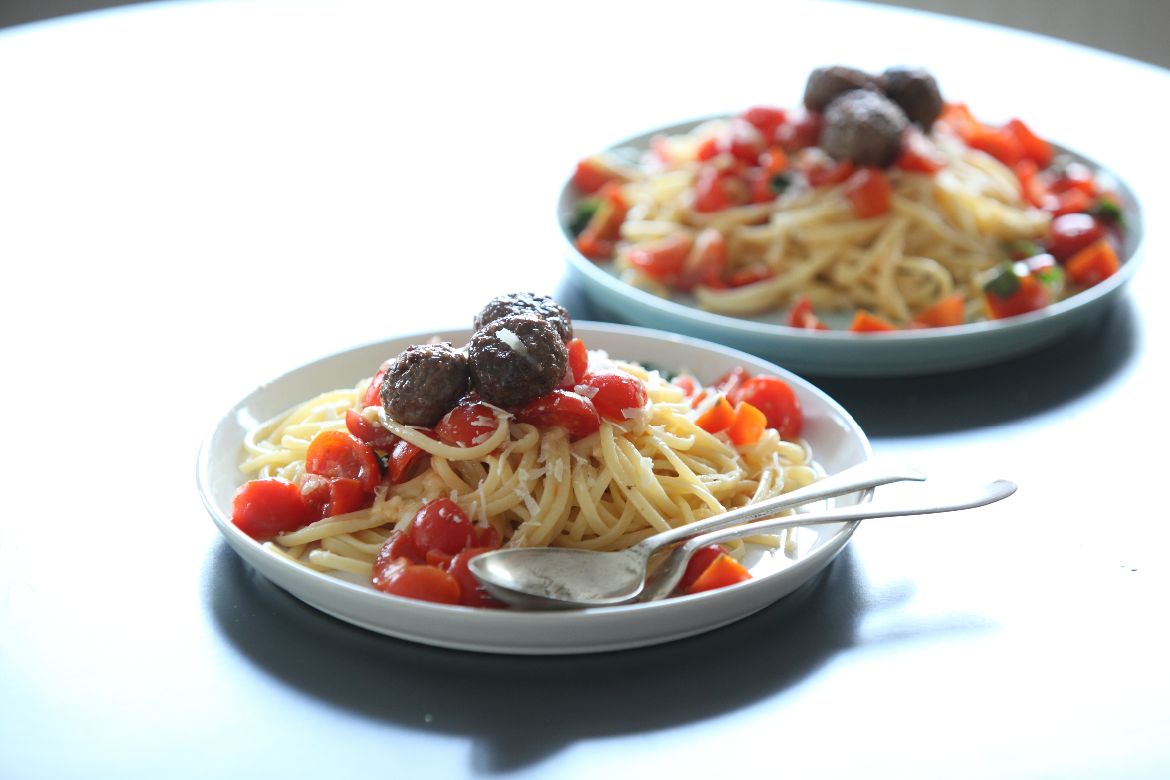
I usually serve this pasta dish with meat balls, but it is great on its own too!
Written by Corin
Kids in the Kitchen
Herbs – The basil leaves need tearing or slicing, so get those little fingers to work. Get them to count out the 10 needed and tear them into the bowl for the tomatoes.
Tomatoes – One for the older children as slicing tomatoes can be tricky without a sharp knife. I find sometimes using a serrated knife can do the job really well so let them try this and make sure to supervise too.
Grating – Grating, especially hard cheeses like the ones in this recipe are a great way to get kids of all ages involved. If you have a multiple sided grater, let the child choose what side they use or if you have a rotary grater too this can be a lot of fun and great for fine motor skills too!
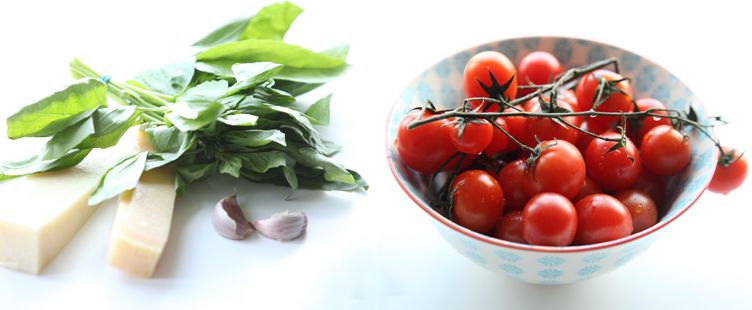
Slice the tomatoes into quarters by slicing from where the stem attaches to the bottom. Place in a bowl with garlic and basil, and stir in the sea salt, ground pepper and olive oil. Cover with a plate and leave to sit for 20-25 minutes, stirring once throughout the process.
Cook the linguine in the sauce pan to desired tenderness. Strain the pasta through a sieve and return the pasta to the sauce pan, however the sauce pan does not need to be returned to heat.
Add the cheese to the sauce pan and stir well until melted. Remove the garlic pieces from the tomato mixture then add the tomatoes to the pasta and stir well. Serve with a sprinkling of Parmesan and enjoy.
*Make it vegetarian – find suitable vegetarian alternative cheese to grate into and over the pasta. Serve without meatballs.
**Make it vegan – omit all cheese and add 5-10 grams nutritional yeast. Serve without meatballs.
This soup, based on a recipe in the Rebar Modern Food Cookbook called the Thai Dragon Bowl, is great because it’s simple and very versatile. I’ve made it so many times with different variations so I’d recommend experimenting with the ingredients to suit your fancy or what you have to hand.
I increased the quantity of curry paste in the stock to make it more flavourful and spicy too. I also added the shallots as well as the scallops but you could easily change these for prawns or a seared steak, sliced after frying. This is the first time I’ve made this soup with Thai Basil, if you can’t source Thai basil then Italian basil will be fine but the Thai basil does add a unique peppery, liquorice flavour.
I’d also like to introduce my new little side kick, Luna who enjoyed a piece of pak choi as I cooked.
I’m entering this recipe in Elizabeth’s Shop Local blog event as the pak choi is UK grown and was in my veg box last week. I am also entering it into Simple and In Season, hosted by Ren Behan.
3 lemongrass stalks, top 2 inches trimmed off and the remainder finely sliced
3 tablespoons galangal or ginger, finely chopped
3 garlic cloves, finely chopped
1 tablespoon coconut oil (can replace with groundnut or vegetable oil)
4 shallots, finely sliced
1-2 tablespoons red curry paste to taste
2 tablespoons palm sugar
3 tablespoons light soy sauce
60ml fish sauce
250ml coconut milk (optional or use less for a healthier option or light coconut milk)
juice of one lime
150g noodles (thick rice or udon noodles)
200g firm tofu, cut into 1-2cm cubes
12 scallops
2 tablespoons unsalted butter
4 Kaffir lime leaves, stems removed and finely sliced
200g of pak choi, chopped
1 bunch spring onions, finely chopped into diagonal rounds
200g of cherry or plum tomatoes, cut into quarters
60g fresh coriander, stems removed and chopped
120g Thai basil leaves, roughly torn
2-4 Thai red or green chillis, finely chopped
Cooking Method
Heat the stock in the stockpot and bring to a gentle simmer before adding the lemongrass, galangal and garlic. Leave to simmer for 15 minutes then strain the stock through a sieve into a medium bowl.
Return the stockpot to the hob over a medium heat and add the coconut oil. Once melted add the shallots and gently fry until translucent, but not brown. At this point, return the stock to the pan and bring to a gentle simmer again.
Stir in the curry paste, palm sugar, soy sauce and fish sauce and simmer for a further 5 minutes. Add the coconut milk and more soy sauce or fish sauce if desired.
Now add the noodles, tofu, kaffir lime leaves and cook for about 5 minutes or until the noodles are ready.
After about halfway through the cooking time of the noodles, add the pak choi.
Meanwhile, in the frying pan heat 2 tablespoons of butter until it starts to bubble then add the scallops flat side down, cook for around 2 minutes per side until slightly browned being careful not to overcook them.
Once the noodles are tender add the spring onions, tomatoes, lime juice, coriander, and Thai basil. Stir well and serve immediately with 3 scallops per bowl and sliced chilli rounds.
In my veg box last week I received some lovely Purple Sprouting Broccoli, which according to Beanies blog has been growing well in all the Spring sunshine we’ve had. I decided to try a Broccoli Soup recipe based on one from a restaurant called Rebar in my home town of Victoria, BC, which I’ve made a couple of times before.
This time I replaced the regular broccoli with the sprouting purple variety. I also swapped the parsley and the Parmesan cheese in the pesto for peppery rocket or arugula as Canadians call it, and a hard goats’ cheese. The original recipe only uses the broccoli florets, but I used the leaves and stems (where possible) in order to limit waste and in my view… the more veg the better!
I love how the pesto in this recipe adds a punch of flavour to the soup however don’t be tempted to add more garlic to the pesto! As a garlic lover I often add more than a recipe calls for, but I can attest to the fact that there is no need in this case as the first time I tested this recipe I got a wicked headache from adding extra garlic to the pesto, so be warned!
I’m linking this recipe to Helen and Michelle’sExtra Veg blog event for March, a brilliant and healthy idea which is all about adding an extra portion of veg to your meals/snacks therefore filling you up so you’re less likely to munch on the bad stuff! I’m also entering this recipe for Ren’s Simple and in Season blog event and Elizabeth’s Shop Local blog event.
Put the rocket, almonds, garlic clove and goats’ cheese in the food processor.
Pulse to combine and then slowly pour in the oil.
Mix until smooth and season to taste.
For the Soup
Prepare the broccoli by cutting off any of the stems that are too tough, and then peel the remaining outside of the stems to remove any further toughness. Reserve 2 cups of broccoli florets generally the same size including about an inch or 2 of the stems and set aside for later. Roughly chop the remaining broccoli, leaves, and stems. Make sure you cut out the stems of the broccoli leaves if these are tough, or at least cut the stems up the middle lengthwise to soften them up.
Gently heat the vegetable or chicken stock in a saucepan and keep it warm while preparing the rest of the soup.
Over a medium to high heat, heat the vegetable oil in the stockpot and sauté the onion until it is translucent. Add the garlic, salt, thyme and chilli flakes and cook for a few more minutes.
Mix in the broccoli, leaves and stems as well as the potato. Cook for a few minutes and then add the stock to cover. Simmer, partially covered until the potatoes and broccoli are just cooked.
While the soup is simmering, bring a small/medium saucepan of water to the boil.
Prepare a bowl of iced water with 5-10 cubes. You’ll be plunging the reserved florets of broccoli into the iced water when you take it off the heat. Quenching in cold water will prevent it from loosing it’s colour.
When the saucepan has reached a rolling boil add 1 teaspoon of salt (which will increase the boil) then carefully add the reserved broccoli florets. The broccoli is done when it is slightly softened although still bright green and firm. This takes around 1-2 minutes after the water has started to re-boil after the broccoli florets have been added.
When the broccoli is done remove it using a skimmer or slotted spoon and put it into the bowl of iced water.
Let the broccoli cool and then remove it from the water on to a clean towel to dry.
Remove the stockpot from the heat and stir in the spinach. Once the spinach wilts, puree the mixture with a hand blender or soup blender until almost smooth. Add the cream and season with salt and pepper.
Reheat the soup if necessary, and then serve with a garnish of broccoli florets and a dollop of pesto in each bowl.