Tag Archive: Vegan

  1. Tangerine and Prosecco Sorbet

    5 Comments

    With all the sunshine lately, this gorgeous sorbet beckons. It is light, fruity and would be fabulous served between courses, sometimes called an Intermezzo to cleanse the palate, or as a refreshing dessert.

    Tangy yet sweet, the tangerines add a wonderful colour and flavour to this dessert.

    ProWare's Tangerine and Prosecco Sorbet Ready to serve


    Written by Corin


    Serves: 10-15

    Prep time: 20 minutes

    Cooking time: 15 minutes (plus 2-4 hours to cool in fridge, churning time in an ice cream maker, then 8 hours in freezer) 


     Ingredients

    • Roughly 500ml dry Prosecco, chilled
    • Zest of 5 tangerines (approx 1-2 tablespoons)
    • 1 litre of tangerine juice, strained (15-20 tangerines depending on their size)
    • 375ml water
    • 300g caster sugar
    • Serve with Wafers or similar (optional)

    Equipment

    • Copper Base 16cm Saucepan
    • Whisk
    • Small bowl
    • Chefs Knife
    • Chopping board
    • Ice cream maker (don’t forget to put the bowl in the freezer well in advance, following the manufacturers instructions before use)
    • Spoon
    • Spatula
    • Sieve
    • Hand grater or zester
    • Juicer

    Cooking Method

    1. Put the bottle of Prosecco in the fridge to chill.
    2. Place the water in a small saucepan and add the sugar.  Use a spoon to stir the mixture over a medium heat until it is combined. Once combined, increase the heat slightly and bring the mixture to a gentle boil, then remove from the heat. Transfer the mixture to another bowl and put in the fridge to chill. (about 2-4  hours)
    3. Meanwhile wash 4-5 tangerines and dry them, then use these for the zest/finely grated peel.
    4. Juice enough tangerines until you have approximately 1 litre of juice.  Pour the juice through a sieve to remove the pulp. Then place in a covered container in the fridge to chill.
    5. Place the container you intend to keep the sorbet in into the freezer to chill. Once all mixtures are really cold, mix together the tangerine juice, zest, sugar mixture and Prosecco using a whisk, then transfer it to your chilled ice cream maker bowl and freeze/churn according to the manufacturer’s instructions.
    6. Transfer the sorbet into your chilled container and place in the freezer over night or until hard before serving.
    7. Enjoy!
  2. Cherry Garcia Coconut Milk Ice Cream

    4 Comments

    Ice cream is one of my favourite things. Whether it be regular ice cream, frozen yogurt or my newest love, coconut milk ice cream. I splurged last May and bought myself an ice cream maker and I haven’t regretted it. I have made many frozen yogurts, custard ice cream recipes, and so many varieties of coconut milk ice cream. I’ve come to like the coconut milk ice cream more than traditional ice cream because it is lighter and more refreshing to eat while still having the perfect creamy consistency as well as just the right amount of sweetness.

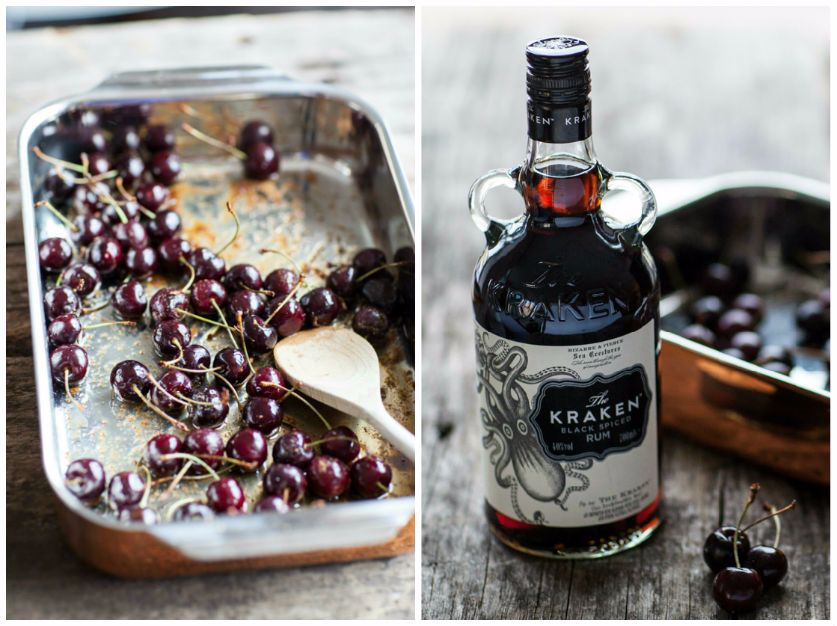
    Roasted Cherries and Kraken Rum

    I’ve roasted the cherries with coconut sugar and 30ml of ‘The Kraken’ spiced rum, which adds a delicious flavour, however if you are going to be serving this ice cream to children or someone avoiding alcohol, it’s best to omit it altogether from the recipe. In general, about a tablespoon of alcohol added to coconut ice cream helps prevent the ice cream from freezing too hard. Since there is over 3 tablespoons of rum in this recipe, it takes much longer to solidify in the freezer; however, this makes it much easier to scoop when you’re ready to eat it.

    The arrowroot powder in coconut ice cream is essential to create a creamy texture.  This can be substituted with corn starch, however arrowroot powder can be found in the baking isle of most larger supermarkets. I use either honey or maple syrup to sweeten the ice cream, but if you want to make it vegan make sure to use maple syrup.

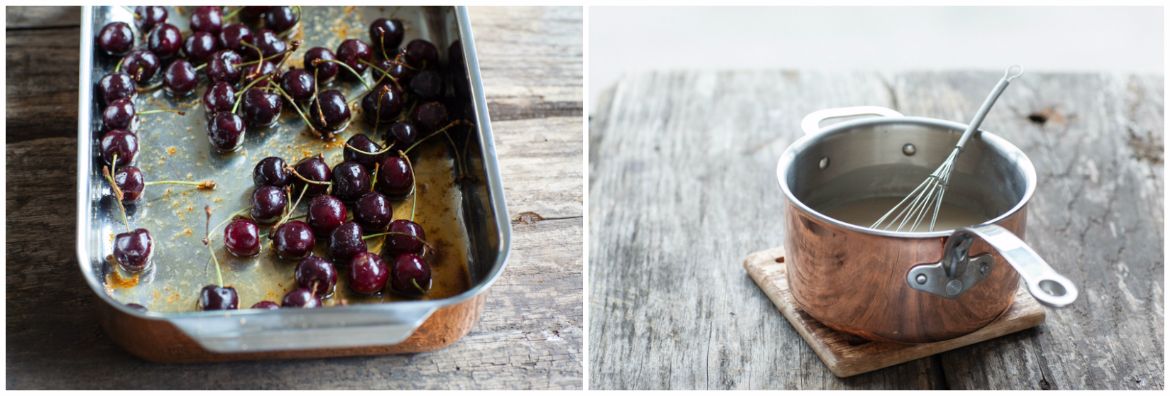
    ProWare Roasted Cherries and 20cm Copper Tri-ply saucepan

    The chocolate chips I used are from and made by local Sheffield independent Chocolate shop and Cafe Cocoa Wonderland. I used their ‘Cute as a Button’ dark chocolate buttons in this recipe, but can also highly recommend the lemon/lime ones if you’re in the mood for a treat. You can order some of their chocolates online, so go on and indulge!

    Written by Corin

                          Chocolate chips and ice cream

    Serves: 8

    Prep time: 10 minutes

    Cooking time: 5-10 minutes (plus 2-4 hours to cool in fridge, then 3-4 hours in freezer)

    Baking time: 20 minutes


    Ingredients

    •  2 cans full fat coconut milk
    • 120ml runny honey (substitute maple syrup to make it vegan)
    • 1 teaspoon vanilla extract
    • 80ml The Kraken Spiced Black Rum (optional)
    • 2 tablespoons arrowroot powder/starch
    • Pinch of fine grain sea salt
    • 1 tablespoon coconut sugar (can substitute with brown sugar)
    • 350g cherries
    • 100g dark chocolate, chopped (I used chocolate chips which I chopped slightly before adding)

    Equipment

    • Copper tri-ply 20cm saucepan
    • Whisk 
    • Small bowl
    • Ladle
    • Chefs Knife
    • Fork
    • Chopping board
    • Oven proof roasting tray or dish
    • Ice cream maker (don’t forget to put the bowl in the freezer, following the manufacturers instructions before use)
    • Spoon
    • Spatula
    • Cherry pitter (optional)

    Cooking Method

    1. Add the coconut milk, honey, vanilla, and salt to a saucepan and bring to a gentle simmer over a medium heat while whisking frequently.
    2. While the coconut milk mixture is heating remove a ladle of the warm mixture into a separate bowl and mix in the arrowroot powder. Use a whisk to mix thoroughly so no lumps remain.
    3. Once the coconut mixture is simmering, add the arrowroot mixture in the small bowl and mix constantly for 1 minute.
    4. Remove from heat and add 50ml of rum. Let the mixture cool slightly, stirring every so often during the process, then transfer to the fridge until very cold (approx 2-4 hours).
    5. Meanwhile, preheat oven to 200°C.  Wash the cherries and strain them so they are fairly dry. Place them in an oven proof dish and pour over 30ml of rum and sprinkle 1 tablespoon of coconut sugar on top. Shake the tray slightly to evenly distribute the rum and sugar.
    6. Place in the oven for 20 minutes shaking the tray about half way through baking time. Keep an eye on them so that they don’t burn. When they start to shrivel slightly remove them from the oven and let them cool before removing the stems and pips. I did this by hand but you could use a cherry pitter if you have one. Then chop the cherries into quarters using a knife and fork.
    7. Before you churn your ice cream put the container you intend to store the ice cream in into the freezer to chill.
    8. Once the mixture is very cold, whisk it briefly then transfer it to your chilled ice cream maker bowl and freeze/churn according to the manufacturer’s instructions. Add the roasted cherries and dark chocolate in the last 5 minutes of freezing until thoroughly combined.
    9. Transfer the ice cream into your chilled container and place in the freezer for a couple of hours before serving.
  3. Cranberry Apple Sauce

    2 Comments

    Cranberry sauce is one of those things that is so easy to make that after you’ve done it once, you’ll never go back to the shop bought kind. It’s one of those one pot wonders where you stick everything into a pan and kapow, it’s done just like that…or maybe not so explosively! However, do feel free to play around with the spices, if you’re not into the dynamic flavour of star anise or simply don’t have it, then just leave it out. I’ve tried this recipe without the apple and it tastes great too, just double check the sweetness and add more sugar if you think it’s necessary.

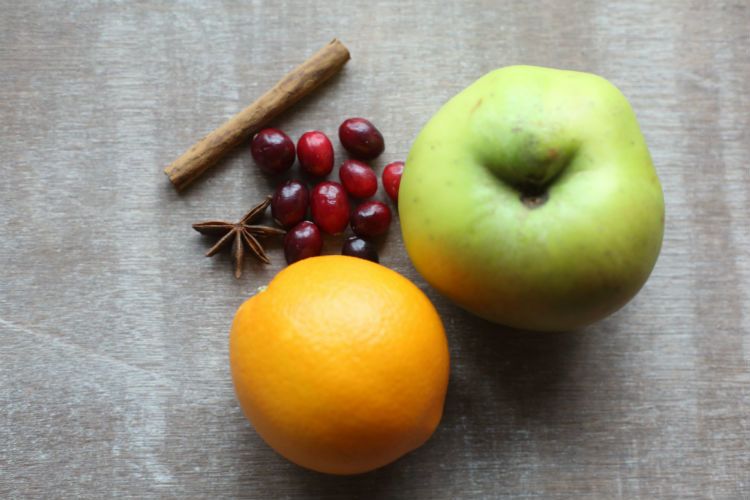
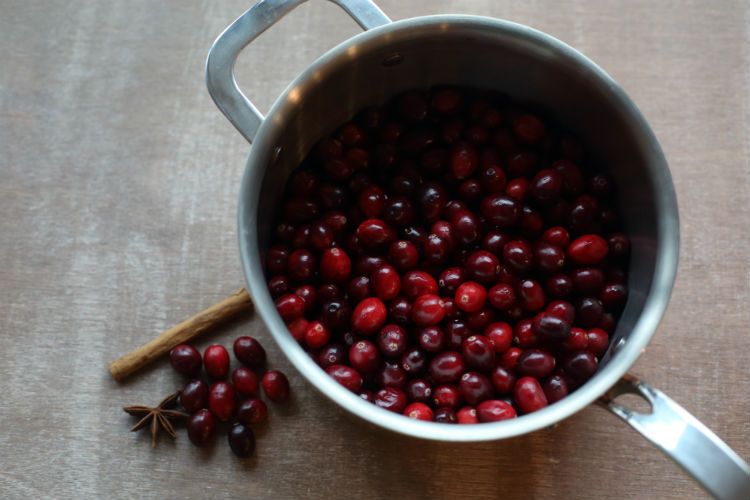
    Cranberry Apple Sauce Prep

    This recipe uses one of our stunning Mini Ladles, which have been silver plated in Sheffield and are available to buy on our website. We think it’s the perfect size for serving this sauce and many more, plus it would be a super cute stocking filler this Christmas.

    Cranberry Apple Sauce

    Written by Corin


    Makes:  3 cups
    Prep time: 2 minutes
    Cooking time: 10-15 minutes


    Ingredients

    • 600g Cranberries, fresh or frozen
    • 1 Large Bramley apple, peeled, cored and chopped into 3cm pieces
    •  90g Caster sugar
    •  50g Brown sugar
    •  2 teaspoons Orange zest
    •  75ml Orange juice
    •  1 Star anise pod
    •  1 Cinnamon stick

    Equipment


    Cooking Method

    1. Place all the ingredients in the sauce pan and cook on low to medium heat for 10-15 minutes or until the cranberries are mostly popped.
    2. Remove from heat and transfer to a bowl. The cranberry sauce will thicken as it cools.
    3. Before serving remove the star anise pods and cinnamon stick.


  4. Fresh Tomato Pasta

    2 Comments

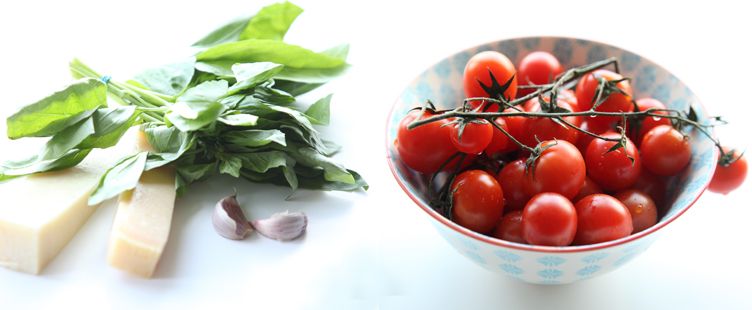
    This dish is a regular in our house since my father-in-law made it for my husband and me a few years ago. It’s based on a recipe from the Silver Spoon Pasta cookbook, if you haven’t heard of the Silver Spoon cookbook this review of their pasta book is worth a read. For this recipe I’ve increased the amount of tomatoes and pasta, because the tomatoes are my favourite part and we tend to eat larger portions of pasta than the original recipe calls for. We also added the Parmesan and Pecorino.

    ProWare's Fresh Tomato Pasta - prep photo

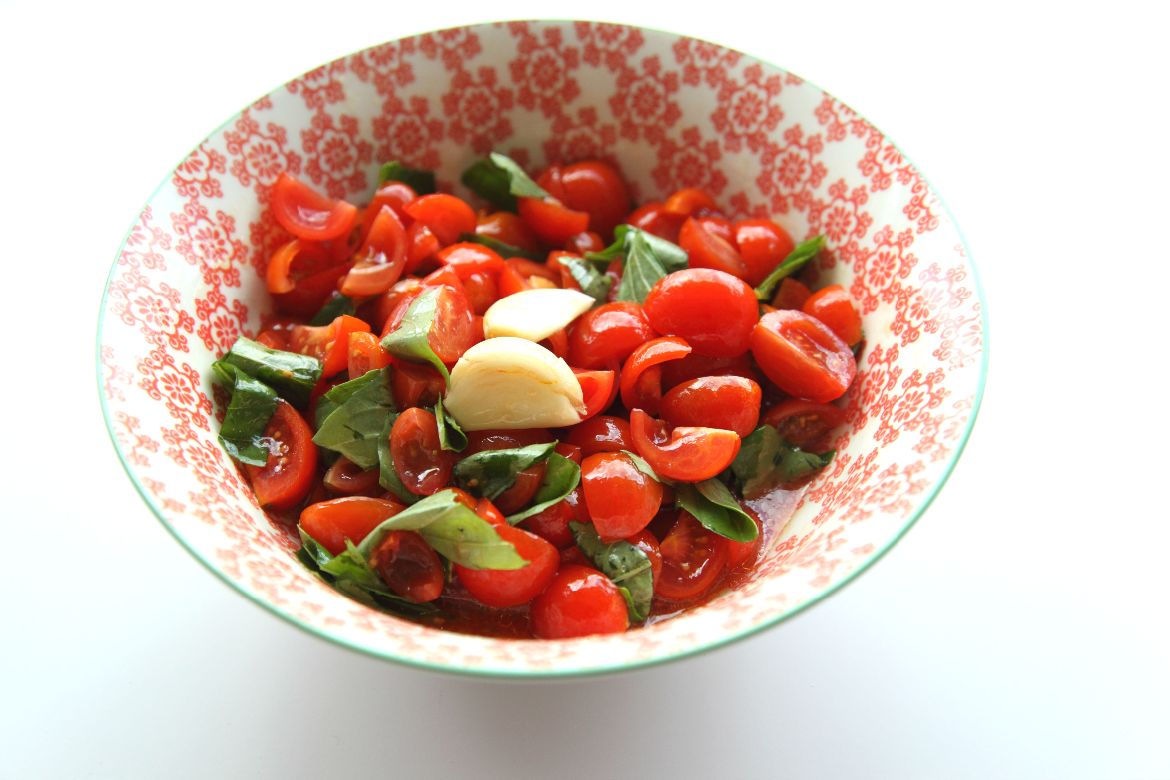
    Here is the tomato mixture ready to be covered and left to sit for 20 minutes.  This helps intensify the flavour in the tomatoes as well as infusing them with garlic.

    ProWare's Fresh Tomato Pasta - chopped tomatoes mixed with garlic and basil

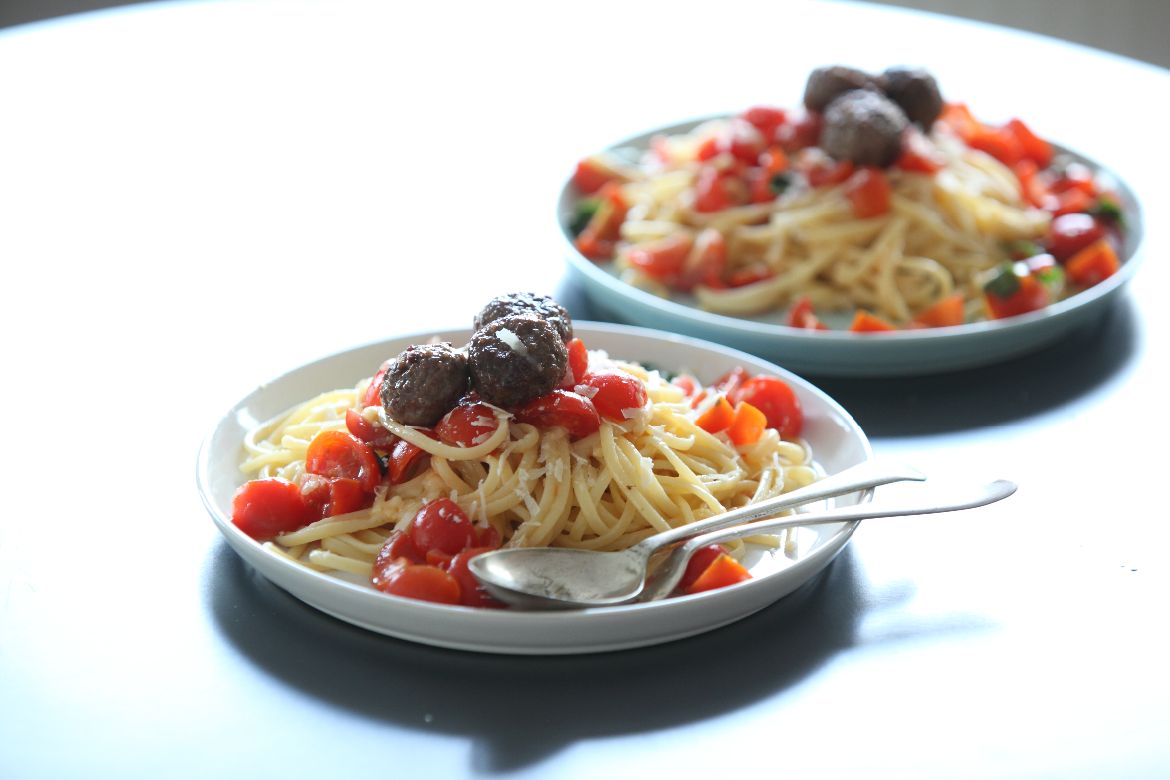
    I usually serve this pasta dish with meat balls, but it is great on its own too!

    ProWare's Fresh Tomato Pasta plated and ready to eat

    Written by Corin

    Kids in the Kitchen

    Herbs – The basil leaves need tearing or slicing, so get those little fingers to work. Get them to count out the 10 needed and tear them into the bowl for the tomatoes.

    Tomatoes – One for the older children as slicing tomatoes can be tricky without a sharp knife. I find sometimes using a serrated knife can do the job really well so let them try this and make sure to supervise too.

    Grating – Grating, especially hard cheeses like the ones in this recipe are a great way to get kids of all ages involved. If you have a multiple sided grater, let the child choose what side they use or if you have a rotary grater too this can be a lot of fun and great for fine motor skills too!

    Serves: 4
    Prep time: 5 minutes (plus 20 minute wait time)
    Cooking time: 10-12 minutes


    Ingredients

    • 600g Plum, cherry or any smaller tomatoes
    •  1-1 ½ teaspoons sea salt
    •  Freshly ground pepper
    •  2 cloves garlic, peeled and squashed using the side of a knife
    •  10 basil leaves, torn or sliced
    •  4 tablespoons olive oil
    •  400g linguine or choice of pasta
    •  80g of Parmesan or suitable vegetarian substitute, grated (Reserve 10g for serving)**
    •  70g of Pecorino, grated**

    Equipment


    Cooking Method

    1.  Slice the tomatoes into quarters by slicing from where the stem attaches to the bottom. Place in a bowl with garlic and basil, and stir in the sea salt, ground pepper and olive oil. Cover with a plate and leave to sit for 20-25 minutes, stirring once throughout the process.
    2. Cook the linguine in the sauce pan to desired tenderness. Strain the pasta through a sieve and return the pasta to the sauce pan, however the sauce pan does not need to be returned to heat.
    3. Add the cheese to the sauce pan and stir well until melted. Remove the garlic pieces from the tomato mixture then add the tomatoes to the pasta and stir well.  Serve with a sprinkling of Parmesan and enjoy.

    *Make it vegetarian – find suitable vegetarian alternative cheese to grate into and over the pasta. Serve without meatballs.

    **Make it vegan – omit all cheese and add 5-10 grams nutritional yeast. Serve without meatballs.

  5. Farinatas

    Comments Off on Farinatas

    Once you’ve made the batter for these farinatas they are quick and simple to cook. They make a great snack or appetiser and have a slightly addictive flavour similar to that of sourdough bread. The farinatas can be served plain, alongside cheeses and cooked meats. We like to cook them with a scattering of rosemary leaves but you can experiment with any number of toppings!

    Makes: 10

    Prep time: 5 Minutes (+6 Hrs Standing)

    Cooking time: A single Farinata takes approx. 12 minutes


    Ingredients

    • 500ml water
    • 1 teaspoon sea salt
    • 150g chickpea flour
    • 15ml olive oil
    • Additional olive oil for cooking

    Equipment

    • Copper Tri-Ply Mini Frying Pan
    • Bowl
    • WhiskProWare's Farinatas
    • Ladle
    • Spatula
    • Oven gloves for handling the pan in and out of the oven and on the hob top. The handle of the fry pan will get very hot whilst in the oven and will retain heat for a long time, so be careful when handling! Oven gloves are essential.


    Cooking Method

    1. Add the ingredients to a bowl and whisk thoroughly until you have a thick batter. Let the mixture stand either at room temperature or in your airing cupboard for at least 6 hours so it begins to ferment. Fermentation will have begun when you see frothy bubbles beginning to appear in the batter. The mixture will last up to 4 days so it can be prepared well in advance.
    2. When you are ready for cooking, preheat the oven to 220°C.
    3. On the hob heat the mini frying pan with a little oil inside. When the oil is very hot ladle in ProWare's Farinatas in our mini frying panapproximately 75ml of the mixture and move it around the pan to ensure even coverage. The mixture should start to bubble slightly at the edges. Add your toppings at this stage.
    4. Move the frying pan to the oven and cook for up to 10 minutes or until the farinata starts to brown slightly.
    5. Using oven gloves remove the frying pan from the oven and allow to cool for a minute so that the farinata can be removed in one piece. Don’t forget that the handle of the fry pan will be very hot!
    6. Serve and enjoy!
  6. Tapas Style Carrots

    Comments Off on Tapas Style Carrots

    This recipe for Tapas Style Carrots, or similar, is found throughout Southern Europe, the French, Italians, Spanish and Portuguese all have a variation of it, the carrots can be served warm or cold, but preferably not hot. They look delightful in our Copper Tri-ply 10cm Mini Casserole and serve as a great accompaniment to almost all simply cooked meat and fish dishes such as grilled, fried or barbecued foods.

    Serves: 4

    Prep/Cooking Time: 10 mins

    Resting Time: At least 1 hour


    Ingredients

    • 500 grams small carrots, a variety such as Chantenay is ideal. Peel the carrots or scrub them without peeling if the skins are blemish free and tender. Do remove the tops and root end though!
    • 3 garlic cloves
    • 3 Tbsp Olive oil
    • 1 Tbsp White wine or cider vinegar
    • Fresh chilli, chopped, green works best as it provides heat and a colour contrast. Remove the seeds for a less spicy dish, leave some or all of them in for more heat.
    • Flat leaf or curly parsley, two or three sprigs chopped finely
    • Dried Oregano also works well with this, a sprinkling, depends on your taste, start with a half teaspoon full

    Cooking MethodProWare's Tapas Style Carrots

    1. Cook the carrots in salted water, use 10 g of sea salt to each litre of water you use. The carrots should be cooked so that they retain a little ‘bite’ or crispness to them. Drain and allow to cool, cut into batons. Dry the carrots thoroughly on kitchen paper.
    2. Crush the garlic cloves and rub them around the inside of a serving bowl, mix oil and vinegar in proportions of about one part vinegar to three parts oil, mix the garlic cloves and oil and vinegar together with the chopped parsley and oregano, season with salt and pepper to taste.
    3. Add the carrot batons, mix well and leave for at least an hour before serving. If you are able to, leaving them several hours even or overnight in the fridge, will improve the blend of the flavours.
    4. Can be used as part of a selection of starter nibbles along with olives and salami etc, or served as a vegetable with the main course.