Tag Archive: Appetisers

  1. Fried Chicken and Kimchi Bao by Brad Carter

    Leave a Comment

    Head Chef Brad Carter of Carters of Moseley has used our brand new Stainless Steel Multi Steamer to whip up these Korean inspired Fried Chicken and Kimchi Baos with a kick!

    Brad used our Copper Tri-Ply range and you can see what we love so much about it here.

    Here’s how you can make them yourself…

    Equipment needed for the Fried Chicken and Kimchi Bao

    Copper Tri-Ply 20cm Saucepan

    Copper Tri-Ply Non-Stick 24cm Frying Pan

    Stainless Steel Multi Steamer

    Ingredients

    (For the Kimchi)

    • 2kg chinese leaf
    • 200g sea salt
    • water to cover
    • 150g gochugaru korean chilli powder
    • 300g leek, finely chopped
    • 3 tbsp minced garlic
    • 2 tbsp finely grated ginger
    • 200g mooli, shredded
    • 1 tbsp fish sauce
    • 1-2 tbsp salt
    • 1 tbsp granulated sugar

    Ingredients

    (For the Bao Dough)

    • 1kg Bao flour
    • 550g water
    • 10g dry yeast
    • 50g sugar
    • 10g salt
    • oil for brushing
    • 18-20 dim sum papers or cut out circles of baking parchment

    Ingredients

    (For the Chicken)

    • 500g Cotswold white chicken thighs, boneless, skinless, cut into bao sized pieces
    • 200g plain flour
    • 75g cornflour
    • 25g rice flour
    • 15g korean red chilli flakes
    • salt to season
    • rapeseed oil for frying

    Ingredients

    (For the Mayonnaise)

    • 200ml kewpie mayonnaise
    • 1 tbsp gochujang paste

    To garnish

    • 2 tsp toasted sesame seeds
    • 4 spring onions, sliced ultra thin

    Method (Kimchi)

    1. Firstly start with the kimchi.
    2. Cut the chinese leaf into quarters keeping the root attached, then rub in the salt.
    3. Put the leaves into a container & pour over cold water just to cover, leave the cabbage at room temperature for 2-3 hours.
    4. Drain the water away from the cabbage & ring the leaves out to remove as much of the water as possible.
    5. Taste the leaves to see how salty they are, this will deter how much salt you add to the rest of the recipe.
    6. Mix the remaining kimchi ingredients together in a bowl & add either 1 tablespoons of salt or the full 2 tablespoons depending on how salty the leaves were tasting, then mix everything into a paste, add to the chinese leaves, rubbing the paste all over the leaves & into the layers.
    7. Add the leaves to a large kilner jar or vaccum pack bag (if you have the luxury!) and lay the quarters into the jar or bag, upright & add the excess paste, seal the jar or bag & leave to ferment at 28c-30c for around 10 days.

    Method (Bao)

    1. Fast forward 10 days & now it’s time to make the bao.
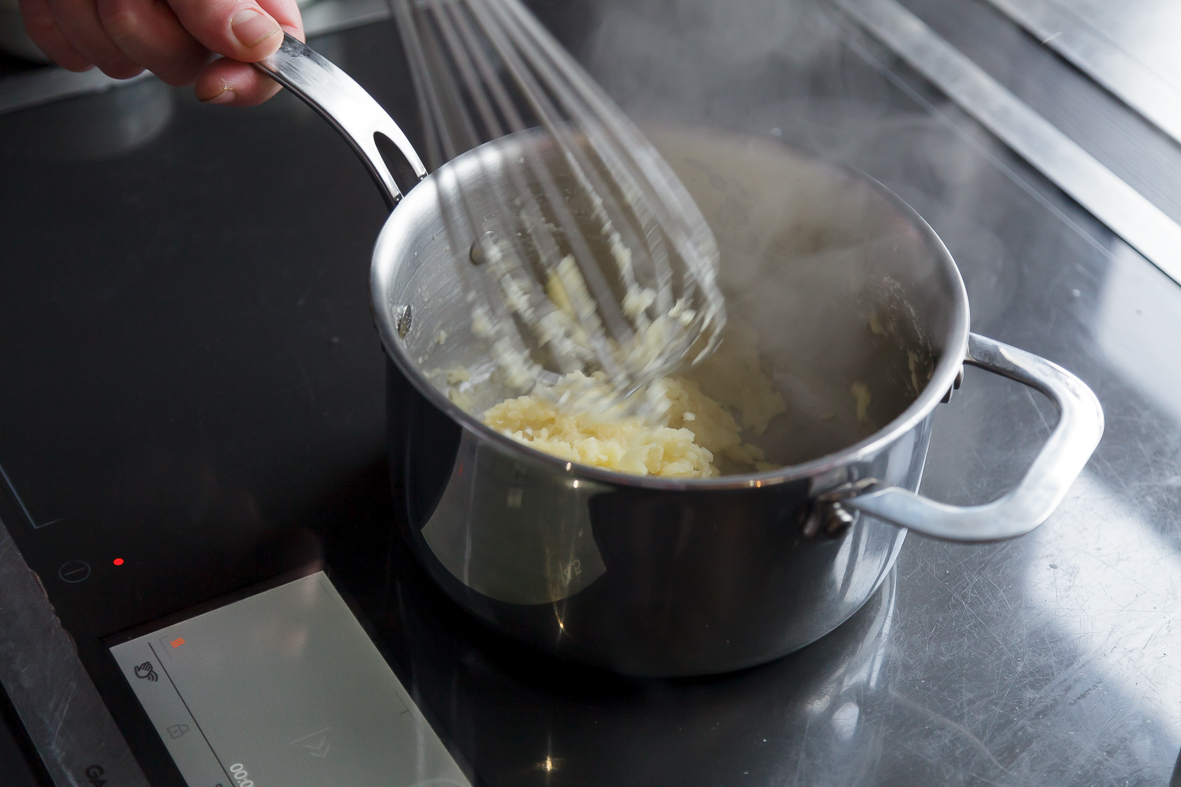
    2. Mix all of the dry ingredients for the Bao dough together & add the water.
    3. Knead for around 3 minutes, add it to a lightly oiled bowl, cover and let it prove for 2 hours at room temperature.
    4. After 2 hours, roll out the dough into a long sausage shape, about 3cm thick, then cut into pieces that are about 3cm wide, you will probably have more buns than you need but don’t worry- you can freeze them if you do!
    5. In the palm of your hand, roll each piece of dough into a ball and leave to rest for 2-3 mins.
    6. Use a dumpling rolling pin to roll out each ball, one by one, into an oval shape about 3-4mm thick. Rub the surface of the dough ovals with oil and brush a little oil over a chopstick.
    7. Place the oiled chopstick in the centre of each oval. Fold the dough over the chopstick, then slowly pull out the chopstick.
    8. Lay out the dim sum papers or baking parchment and put a bun on each. Transfer to a baking tray, cover with a clean tea towel or lightly oiled cling film and leave to prove in a warm place for 1 hr, or until doubled in size.
    9. Heat a large ProWare Stainless Steel Multi Steamer over a medium-high heat. Steam the buns, in batches, for 8 mins until puffed up.
    10. Set the buns aside to reheat later & the excess buns can be cooled & frozen.

    Method (Chicken)

    1. For the chicken, heat 2cm of oil in a deep sided frying pan to around 180c.
    2. Season the chicken all over with the salt.
    3. Mix together the flours & chilli flakes with a whisk then dredge the chicken pieces into the flour mix, fry the chicken in batches turning occasionally for around 5-6 minutes, remove the chicken with tongs & drain on kitchen paper.
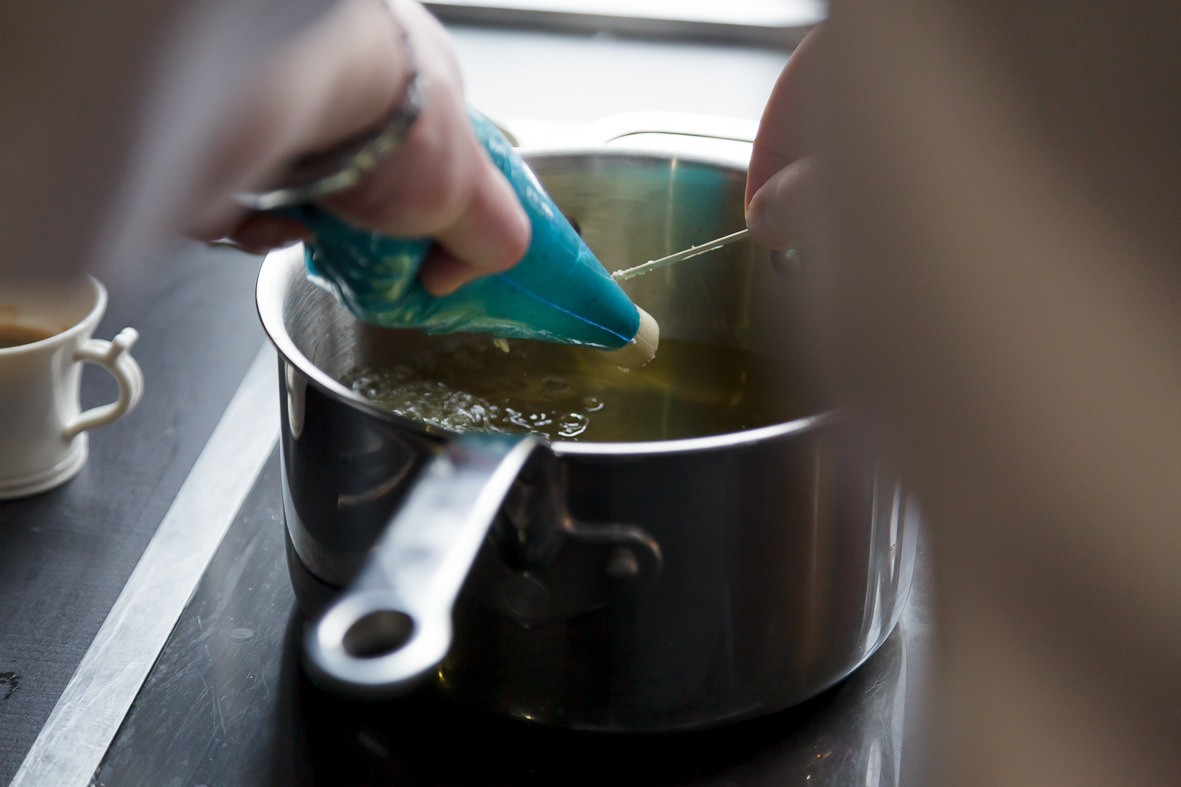
    4. Whisk together the kewpie mayonnaise & the gochujang in a mixing bowl & transfer to a squeezy bottle.
    5. To assemble the bao buns, steam the buns for 1-2 minutes in the bamboo basket & remove.
    6. Add the chicken to the bun & dress with an equal amount of kimchi alongside it, squeeze a healthy amount of mayonnaise over the chicken & sprinkle with the sesame seeds & the spring onions then shove it it in your big, drooling mouth.

    Why not try it at home? Thanks so much for Brad for this amazing recipe. What are you waiting for? Head over to our online shop to purchase your Steamer now!

  2. Blue Cheese Puffs with Smoked Paprika and Olives by Paris House

    Comments Off on Blue Cheese Puffs with Smoked Paprika and Olives by Paris House


    These little finger puffs are uncomplicated, delicious and full of flavour.  Chef Phil Fanning likes to refer to them as posh cheesy wotsits which is very fitting. The richness of the cheese but light pillowy soft texture make them the perfect moreish snack for watching a film!

    If you haven’t got blue cheese, try substituting cheddar or whatever you have to hand. Have fun being creative with this recipe! If you want you can make the batter for these the day before by adding a pinch of xanthum gum to the dough/mixture. Often used in gluten free baking the xanthum gum helps to binds things together more.


    Recipe Courtesy of Paris House

    Serves: 4

    Difficulty: Easy


    Equipment

    • 20cm Copper Tri-Ply Saucepan
    • Blender
    • Piping Bag
    • 20cm Copper Tri-Ply half full (1-2 litres of vegetable oil) or a Deep Fat Fryer
    • Stainless Steel Skimmer spoon or Deep Fryer Basket

    Ingredients

    Blue Cheese Puffs:

    • 140g Water
    • 65g Butter
    • 70g Plain flour
    • 100g whole eggs
    • 85g Stilton
    • 35g Parmesan
    • 1 pinch of Xanthum (optional)

    Smoked Paprika Salt:

    • 4tsp smoked paprika
    • 1 tsp salt
    • ½ tsp sugar

    To Serve:

    • Unpasteurised green olives.

    Cooking Method

    Blue Cheese Puffs:

    1. In a medium, heavy based sauce pan, bring the water and butter to the boil.
    2. Add the flour and immediately beat well to incorporate.Paris House Proware Blue Cheese Puffs
    3. Continue to mix over a medium heat and cook out for 3-5 minutes.
    4. Remove from the heat and allow to cool slightly, add xanthum and then slowly incorporate the eggs.
    5. Add cheese and beat well.
    6. Transfer the mix to a blender, add the cheese and blitz until smooth.
    7. Place into a piping bag and chill in the fridge.
    8. When ready to serve, squeeze a finger width log of the mix from the piping bag and with a pair of scissors, snip small nuggets into a 20cm saucepan or deep fat fryer heated to a 180ºC.Paris House Proware Blue Cheese Puff Piping Bag
    9. Fry the puffs until crisp and golden. Stir them as they cook to give them a uniform colour.Paris House Blue Cheese Puffs Deep Frying
    10. Remove from the fryer and drain on paper.

    Smoked Paprika Salt:

    1. Mix well.

    To Serve:

    1. Season with the paprika salt and serve immediately.
    2. Serve the puffs with a bowl of unpasteurized green olives.
  3. Chocolate Fondue

    Comments Off on Chocolate Fondue

    Looking for a fun and easy chocolate dessert recipe? Look no further than this Chocolate Fondue! Perfect for an evening soiree or fun family gathering!  Dip marshmallows, biscuits or fresh fruit into the hot, melted creamy chocolate goodness. The best part – it only takes 10 minutes to make!

    Recipe by Chef Leslie Buddington from Brocco on the Park, Sheffield


    Makes:  Approx 1 litre
    Prep time: 1 minute
    Cooking time: 10 minutes


    Equipment


    Ingredients

    • 400g dark chocolate
    • 290ml double cream
    • 300ml whole milk
    • 80g unsalted butter

    Cooking Method

    1. Break the chocolate into smaller pieces and put it along with all the other ingredients in a pan. 
    2. Melt on a medium heat stirring constantly until all melted and glossy.
    3. Enjoy with marshmallow or seasonal fruits.
  4. Minestrone Soup by Jane Devonshire

    4 Comments


    We are delighted to share this recipe from Jane Devonshire which also features in her debut book. It’s packed with 100 easy to follow, tasty recipes designed for gluten intolerance and sufferers of coeliac disease but have been thoughtfully created with the whole family in mind. Everyday feel good dishes that are inclusive, suitable for family suppers and sharing with friends and which take the hassle out of catering for different dietary needs. 

    Recipe from Hassle Free, Gluten Free (Bloomsbury Absolute £22) which is out now

    I love serving soup, especially when the kids came home from school, as it stopped them snacking on rubbish until the dinner was ready. I have adapted classic recipes to my family’s tastes – this soup is packed full of vegetables, and I use canned pulses instead of pasta to add substance.

    Serves: 6


    Equipment


    Ingredients

    • splash of olive oil
    • 200g chopped pancetta or smoked bacon
    • 1 leek, chopped
    • 1 large onion, chopped
    • 3 garlic cloves, finely chopped
    • 3–4 sticks celery, chopped (approx. 150g)
    • 4–5 carrots, chopped (approx. 150g)
    • 1 chilli (optional)
    • 2 tablespoons dried mixed herbs
    • 1 litre passata
    • 1 litre gluten-free chicken stock
    • 3 large kale leaves, stalks removed
    • 1 x 400g can cannellini beans, drained
    • 1 x 400g can green/puy lentils, drained
    • freshly grated Parmesan, to serve
    • sea salt and freshly ground black pepper

    Cooking Method

    1.  Heat the olive oil in a large stock pot with the chopped pancetta, leek, onion and garlic, and sauté gently until translucent.
    2. Add the celery, carrots, chilli and dried herbs and sauté for another 5 minutes.
    3. Add the passata and chicken stock and cook for a further 5 minutes, then add the kale, beans and lentils and simmer for 7–8 minutes, until the vegetables are just cooked.

    To serve

    1. Season with salt and pepper to taste, and serve with a really generous grating of fresh Parmesan.

    Jane’s Tip: I always have a stockpile of different types of canned beans and pulses in my store-cupboard. I use them in minestrone soup instead of pasta and I think it’s an improvement. The pasta in the original version can go soggy, whereas with beans the soup can be eaten over a couple of days if kept refrigerated. Beans can also be added quickly to stews and curries to bulk out the ingredients and make them go further if you suddenly get more people for dinner – and the bonus is that they are a healthy addition.

    Photography © Mike Cooper, 2018.

  5. Chilli Pork Spare Ribs by Jane Devonshire

    Comments Off on Chilli Pork Spare Ribs by Jane Devonshire


    We are long time admirers of MasterChef Champion Jane Devonshire and we were lucky enough to meet her at a Foodie Festival in 2017. Jane has since become a wonderful supporter of ours and we were thrilled when she released her debut cookbook in 2018. The book is published by Absolute Press, in association with Coeliac UK and it contains a wide range of delicious, practical, easy to follow gluten-free recipes that cater for all the family. 

    Recipe from Hassle Free, Gluten Free (Bloomsbury Absolute £22) which is out now

    We eat these all year round, often as starters or nibbles, but sometimes with the Egg Fried Rice for a light supper. They pack a real flavour punch and are so easy to make – everything is prepared straight into one pan on the hob.

    Serves: 4


    Equipment

    • Large wok or non-stick pan with a lid
    • Measuring spoons
    • Spatula

    Ingredients

    •  1 x 750g rack of baby back pork ribs, chopped into individual ribs
    • 3 tablespoons sunflower oil
    • 1–2 red chillies, finely chopped
    • 1cm piece of fresh ginger, grated
    • 4 garlic cloves, finely chopped
    • 3 tablespoons golden syrup or runny honey (I prefer syrup as it gives the stickiness without the distinctive honey flavour) *
    • 2 tablespoons dry sherry or rice wine
    • 140g tomato purée
    • 4 tablespoons gluten-free dark soy sauce (I use Clearspring tamari soya sauce)
    • finely sliced red chilli and spring onion, to serve (optional)
    • sea salt

    * check for gluten content or cross contamination


    Cooking Method

    1. Place the ribs into a large wok or non-stick pan with a lid. Measure out the 3 tablespoons of oil (don’t wash the measuring spoon) and add to the pan with a good pinch of salt.
    2. Add the chillies, ginger and garlic, and use the oily measuring spoon to measure out the golden syrup or honey (this stops it sticking to the spoon and makes life much easier).
    3. Finally, add the sherry, tomato purée, dark soy sauce and 125ml water, and use a spatula to mix all the ingredients together until the ribs are well coated in sauce.
    4. Put the lid on the pan, place it over a low heat and cook for around 1 hour, stirring every 20 minutes to ensure the ribs are evenly coated; check more regularly towards the end of the cooking time to ensure they’re not burning. The ribs need to be a dark red caramel colour with a thick sauce; when tested with a knife the meat should be really tender so it comes away easily from the bone.
    5. Leave the ribs to sit, covered, for 10–20 minutes, then serve directly from the wok or pan, or transfer to a serving platter, sprinkled with finely sliced chilli and spring onion.

    Jane’s Tip: To test the heat of a chilli, I cut the green top off and put it to the tip of my tongue; I can usually ascertain the heat from this touch. Another method of controlling the heat of chillies is to leave the chilli whole, just slice down the middle, and place it in the dish while cooking; as soon as the dish is the right heat for me, I remove the whole chilli.

    Photography © Mike Cooper, 2018.

  6. Polish Gnocchi with Bacon and Mushrooms by Ren Behan

    Comments Off on Polish Gnocchi with Bacon and Mushrooms by Ren Behan

    This recipe has been taken from Wild Honey & Rye: Modern Polish Recipes – Author Ren Behan. Published by Pavilion Books and image credit to Yuki Sugiura.

    Kopytka translates as ‘little hooves’ and they are sometimes described as Polish gnocchi because they are similar to Italian gnocchi. Some Poles also call these paluszki, which means ‘little fingers’. I sometimes experiment with gluten-free flour and I like to make these with almond flour. These can be served sweet, too, with melted butter and a sprinkle of sugar, drizzle of honey or maple syrup – even for breakfast. If you add twaróg, Polish soft cheese, to the dough, you end up with leniwe, ‘lazy dumplings’. In the Ukraine, these are made simply with cheese, egg and flour and called halushky.

    Serves: 4

    Cooking time: Gently boil for 3-4 minutes


    Equipment

    • Large frying pan
    • 20cm Saucepan

    Ingredients

    • 500g/1lb 2oz potatoes, such as Maris Piper or a heritage variety, peeled
    • 250g/9oz/2 cups plain (all-purpose) flour, plus extra for dusting (or use almond flour for a gluten-free version)
    • 1 egg, beaten
    • sea salt and freshly ground black pepper

    To serve

    • vegetable or olive oil
    • 1 tsp butter
    • 1 onion, finely chopped
    • 100g/3½oz Polish bacon, boczek, or pancetta
    • 200g/7oz fresh chanterelles, or porcini or chestnut mushrooms
    • 2 tsp chopped fresh parsley

    Cooking Method

    1. Boil the potatoes in a large pan of salted water until very soft. Drain and set to one side to steam dry. Once cool and very dry, mash until smooth. Leave the potatoes to cool completely or chill in the fridge.
    2. Put the cold mashed potato into a large bowl. Add the flour, beaten egg and a good pinch of salt and pepper. Using a metal spoon, bring the mixture together, then tip it out onto a lightly floured board or work surface and knead until all the flour is incorporated into the potato. The dough should be fairly soft and springy, but not too sticky.
    3. Sprinkle a little more flour onto the board and cut the dough into quarters. Roll each piece into a long cylinder and cut the dough at an angle into 2.5cm/1in pieces. Repeat until you have used up all the dough.
    4. Bring a saucepan of salted water to the boil and drop a few dumplings in at a time – it’s best to cook them in batches. Gently boil for 3–4 minutes; they will rise to the top once cooked. Take them out with a slotted spoon, drain in a colander and continue until you have cooked all the dumplings. Set them to one side.
    5. Heat the oil and butter in a large frying pan and cook the onions for 4–5 minutes until soft. Add the bacon and fry until golden and crisp. Add the mushrooms, season with salt and pepper and stir in the parsley. Add the kopytka to the pan, stir everything together and cook until the kopytka begin to turn golden, then serve.


    Published by Pavillion Books.

    Feature image credit to Yuki Sugiura.


  7. Wild Sea Trout cured in Douglas Fir Gin, Linseed Cracker and Pickled Vegetables by Jöro

    Comments Off on Wild Sea Trout cured in Douglas Fir Gin, Linseed Cracker and Pickled Vegetables by Jöro

    Jöro‘s Chef Director Luke French has created yet another stunning Christmas recipe for us. This is an impactful starter which is easily made ahead of time.

    Luke chose Twisting Spirits Douglas Fir Gin to cure the wild sea trout. This gin is distilled over Douglas Fir pine needles which lend a unique, Christmassy aroma and flavour. The background flavours of the gin, grapefruit, lemon and cut grass, provide a lovely counter-balance to the oily goodness of the wild sea trout. Twisting Spirits forage for the Douglas Fir pine needles locally to their South Oxfordshire micro distillery. If you are looking for the perfect gift for gin lovers this Christmas look no further than Twisting Spirits’ Selection Gift Packs which include the Douglas Fir Gin, a Kaffir Lime & Lemongrass Gin and an Earl Grey Gin.

    ProWare Christmas Recipes Joro Trout

    This recipe will help you get ahead at Christmas as it can (and should!) all be made before the day. The trout needs a few days to cure, so make sure you build time in for that and the linseed crackers can be baked and stored in an air-tight box for up to a week. If you haven’t got time to pickle your own vegetables make sure to pick up a jar of pickled vegetables to accompany the dish. Jöro’s recipe for pickled vegetables is very quick and easy, check it out here.

    ProWare Christmas Recipes Joro

    Serves: 6 as a starter

    Prep time Trout:  15 minutes

    Resting time: 3 days in the fridge

    Prep time Crackers: 15 minutes

    Cooking time: 50-60 minutes


    Equipment


    Ingredients

    Trout

    • 1 x 500/600g piece of wild sea trout, de-scaled and de-boned
    • 1 bottle of Twisting Spirits Co. Douglas Fir Gin (available online, of course you can use any kind of gin, Douglas Fir just tastes like Christmas!)
    • 100g sea salt
    • 100g caster sugar
    • 5 green juniper seeds
    • 1 small branch of Douglas Fir (Christmas/pine tree), needles removed
    • 1 jar pickled vegetables to serve.

    Crackers

    • 350ml water
    • 2.5g table salt
    • 20g potato starch
    • 50g linseeds
    • 15g white sesame seeds
    • 15g black sesame seeds
    • 20g sunflower seeds

    Cooking Method

    For the Trout:

    1. Begin by scoring the skin of the trout every few centimetres but taking care not to cut into the flesh.
    2. To cure the trout: add the salt, sugar, juniper and pine needles to the bowl of a food processor and blend to a fine powder. Pour into a bowl and add the gin liberally until a thick slurry is formed and the mixture is beautifully aromatic and boozy.
    3. In a tray place a large but even layer of double lined cling film and then smother with an even layer of the cure mixture and then place the trout on top, followed by another layer of the cure mixture, then wrap tightly with the excess cling film and place the tray in the fridge and leave it for around 3 days, turning the fishy parcel over twice a day.
    4. When it is ready the fish should be firm to the touch on the outside and tender throughout, to finish the preparation, carefully wash off the cure mixture under cold running water for 5 minutes, then dry well with kitchen towel, remove the skin and slice thinly and reserve in the fridge, covered.

    For the Crackers:

    1. Place the water and salt into a pan, using a handheld blender, gradually add the starch whilst blending until fully combined without lumps, if there are any lumps, pass through a fine sieve into a clean pan.
    2. Place over a medium heat and add the seeds, stirring continuously until the mixture thickens to custard-like viscosity. Pour it onto a baking sheet lined with non-stick paper and bake in a pre-heated oven at 160C for 50-60 minutes until dry and crispy, then remove from the oven and allow to cool, break into desired sized pieces and store in an airtight container until needed.
    3. Serve the trout with the crackers and pickled vegetables.
  8. Sourdough Crumpets by Jöro

    Comments Off on Sourdough Crumpets by Jöro


    Jöro‘s Chef Director Luke French has created this delicious recipe for us for sourdough crumpets.

    Resting time: overnight 8-10 hours


    Equipment


    Ingredients

    • 270g sourdough starter
    • 10g Sheffield Heather Honey
    • 2g table salt
    • 2g bicarbonate of soda

    Cooking Method

    1. Mix the starter, honey, and salt together. Stir, then allow the starter to ferment overnight, 8-10 hours.
    2. Rub your ProWare Pan and metal crumpet rings with a little smoked butter, then place over a medium heat. It is pretty easy to burn the bottom of the crumpets if you’re not too careful, be ready to adjust the temperature – you want the pan to be hot but not smoking hot!
    3. Stir the bicarbonate of soda into the sourdough mixture – It will start bubbling quite quickly.
    4. When the pan and rings are hot, carefully spoon the mixture into them, leaving a little gap at the top to allow for the crumpet mixture to rise.
    5. When the edges are cooked, remove the crumpets from the rings and flip them over and cook for a further 2-3 minutes.


    To serve

    • We serve ours with Miso Cultured butter
  9. Pickled Vegetables by Jöro

    Comments Off on Pickled Vegetables by Jöro

    This recipe for quick pickled vegetables is effortless, but the end result is a refreshing addition to any plate. Jöro serve these vegetables alongside their Cured Wild Sea Trout recipe and they complement the fish wonderfully. This type of pickling doesn’t require canning, as you tend to use them with a week or so. In addition to this, you can adapt this recipe to use pretty much any vegetable you would like.

    Serves: 6+

    Prep time: 10 minutes

    Resting time: 1 day


    Ingredients

    • 300g white wine vinegar
    • 200g water
    • 100g caster sugar
    • 10g dried kombu seaweed (available from health food shops mostly)
    • 1 carrot
    • 5 baby onions
    • 1 leek, white/light green part only discarding the dark green tops
    • 1 turnip
    • (any vegetables you like really!)
    • table salt

    Equipment


    Method

    1. Place the vinegar, water, seaweed and sugar in a pan and bring to the boil, season with a pinch of salt to taste.
    2.  Meanwhile, clean and peel the vegetables and cut into desired shapes.
    3. Once the pickling liquid has come to the boil, remove from the heat and allow to cool slightly, before pouring over the vegetables, then leave to pickle for at least 1 day before using.
  10. Balsamic Pear and Smoked Bacon Salad

    Comments Off on Balsamic Pear and Smoked Bacon Salad

    This recipe was given to us by the first runner up in our Autumn recipe competition; Helen Huxley’s Balsamic Pear and Smoked Bacon Salad. This salad is packed with seasonal flavour. The savoury and sweet ingredients make this light meal a real treat for the taste-buds.

    This is why Helen loves this recipe:

    “This is a quick and tasty recipe for when you want a salad and something warm but not anything stodgy. It is easy to prepare and nice with crusty bread. Split into 4 portions and serve as a starter at a dinner party, have it is a fantastic lunch or a quick supper!”

    Balsamic Pear Salad

    Serves: 2

    Prep time:  5 minutes

    Cooking time: 10 minutes 


    Ingredients

    • 50g pine nuts, toasted
    • 6 rashers of smoked, streaky bacon, chopped
    • 1 pear, halved then quartered
    • 2 tablespoons balsamic vinegar
    • 2 teaspoons honey
    • 100g blue cheese
    • Mixed salad leaves, to fill 2 bowls

    Equipment


    Cooking Method

    1. Begin by toasting the pine nuts in a mini frying pan and then set aside.
    2. Chop the bacon, dry fry until crisp and then remove from pan.
    3. Core and chop the pear in half, chop each half into quarters and then place these into a larger frying pan.
    4. As the pears are browning add the balsamic vinegar and honey and leave to reduce. Once reduced return the bacon and pine nuts to the pan to warm.
    5. Fill 2 bowls with mixed salad leaves and then pour the bacon and pear mixture, along with the hot dressing, over the leaves.
    6. Finish by crumbling 50g of blue cheese over each bowl and enjoy!